Stitched Stories: Women in History
Grade Level
3rd • 4th • 5th
Subject Area
Elementary History & Social Studies
Related Documents
Download Full Lesson Plan +
In this lesson, students will create portraits to explore identity, emotion, and the stories of people whose lives have often been overlooked. Students can choose between two hands-on approaches: stitching or gluing materials on burlap napkins.
Through careful, thoughtful work, students will build texture, form, and patterns to represent faces, hair, and clothing. As they create, they will reflect on how portraits can honor people, convey emotion, and tell stories that history hasn’t always noticed. This project connects artistic skill with empathy, historical understanding, and creative expression, showing that even simple materials can communicate powerful ideas.
Big Ideas
What female voices have been lost to history, and how can a stitched portrait help us honor and revive their stories? What can a portrait reveal about lives that have been overlooked or forgotten?
3–5 Class Periods
Students will create a stitched portrait of a woman or girl from history, using yarn/embroidery floss and fabric to represent identity, story, and significance. Through this process, students will demonstrate care, patience, and creativity while reflecting on the importance of making historically overlooked people visible.
Alternatively, students can glue yarn onto the burlap fabric: They can outline features, add hair, and create patterns in clothing using yarn and glue, achieving a similar sense of texture and care.
Essential Vocabulary
Yarn
Embroidery Floss
Beads*
Needle
Fabric
Stitch
Running Stitch
Glue
Texture
Pattern
*Check to ensure that the needles can fit through the opening of the beads.
Primary Sources
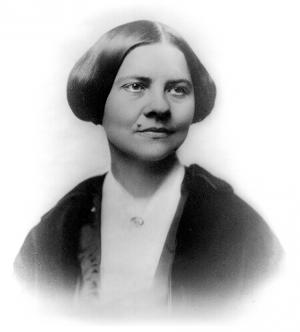
The following could inspire students to determine whom they would like to represent and to provide an image.
- NWHM Biographies
-
Little Legends: Bold Women in Black History by Vashti Harrison *The images in this book are somewhat cartoonish, but they are very informative.
-
Library of Congress “Votes for Women” photograph collections
-
Historic photographs of women leaders and activists
Materials for Stitching Portraits
Burlap Napkins
with a bound edge for the base fabric
Embroidery Thread/Floss or Yarn
in multiple colors for facial features, hair, clothing, and symbols
Embroidery Needles
age-appropriate size, with blunt tips for safety
Embroidery Hoops*
to keep the burlap taut while stitching; helpful but can be challenging for some student
Scissors
Yarn/Embroidery Floss
in multiple colors
Heat-Erasable Markers
for lightly sketching before sewing
Iron
to erase pen marks
Fabric
for clothing
Beads
for hair or other designs
*Optional
Materials for Gluing Yarn Portraits
Burlap Napkins
with a bound edge for the base fabric
Embroidery Thread/Floss or Yarn
in multiple colors for facial features, hair, clothing, and symbols
Embroidery Needles
age-appropriate size, with blunt tips for safety
Scissors
Yarn/Embroidery Floss
in multiple colors
Liquid Glue
or attaching yarn
Heat-Erasable Markers
for lightly sketching before gluing yarn
Iron
to erase pen marks
Fabric
for clothing
Beads
for hair or other designs
Student Examples
Classroom Management
- Storing student work in large ziplock bags helps to keep all materials together, especially for stitching.
- Write the student's name on masking tape and apply it to the back of the burlap.
- Small containers or trays to hold threads, yarn, or other materials.
- Scrap fabric for practicing stitches or gluing techniques.
- Reference images of portraits of women or girls from history.
- Optional display materials: clipboards, boards, or wall space for finished portraits.
Procedures for the Stitched Portrait
- Practice drawing a portrait on paper, considering proportions and expression.
- Draw the face, hair, and clothing lightly on the burlap napkin using a heat-erase pen.
- Thread your needle with yarn and tie a knot at the end.
- Begin stitching along your drawn lines using a running stitch. Emphasize pushing the needle up from the fabric and returning it by going down. Kids often go around the edge of the fabric until they get the hang of it.
- Work from large shapes (face, hair) to smaller details (eyes, mouth, symbols).
- Tie off your yarn when finished and trim any extra strands.
- Add beads and fabric if desired.
- Use an iron to erase your guidelines once stitching is complete.
Procedures for the Glued Portrait
- Practice drawing a portrait on paper, considering proportions and expression.
- Lightly draw your face, hair, and clothing on paper using a pencil or heat-erase pen.
- Cut or select yarn pieces for the lines you want to create.
- Apply glue along the drawn lines and carefully press the yarn into place.
- Work from large shapes (face, hair) to smaller details (eyes, mouth, clothing patterns).
- Add beads and fabric if desired.
- Trim any extra yarn once glued and allow the glue to dry completely.
- Once the portrait has completely dried, use an iron to erase your guidelines once stitching is complete.
Warm-Up
Show an image of a historic portrait and cover the name. Ask students:
“What if someone lived a full life, but their name was never written down?”
“A portrait can help us remember someone, even when history didn’t.”
“How can you give that person the representation they deserve?”
Direct Instruction for Stitching
- Introduce stitched portraits as a way artists use yarn and fabric to show identity and belonging.
- Show examples of stitched or textile portraits and identify how lines, shapes, and texture are created with stitches.
- Explain that students will create a portrait by stitching yarn on a burlap napkin.
- Demonstrate how to lightly draw facial features, hair, and clothing on burlap using heat-erase pens. The marks can be erased using an iron on low heat. I teach the kids how to safely use the iron; it is up to each teacher to decide what is best for their group.
- Model how to thread yarn through a needle and tie a secure knot.
- Demonstrate a basic running stitch and explain how stitches create dashed lines.
- Show how to stitch along the drawn lines using even spacing.
- Guide students to begin with large shapes (face outline, hair) before adding smaller details.
- Encourage students to choose yarn colors and symbols to accurately represent the person they are stitching.
- Reinforce safe needle handling and slow, careful stitching. Remind students that stitches can be removed if necessary.
- Support students in problem-solving with tangled yarn, uneven stitches, or missed stitches. *Having another adult(s) in the beginning can be helpful.
- Allow time for tying off stitches and trimming yarn.
- Once the portrait is completed, use the iron to erase any ink marks.
- Facilitate a brief share where students identify one stitched detail that represents them.
Direct instruction if Gluing Yarn
- Introduce stitched portraits as a way artists represent identity using the look of stitches.
- Show examples of stitched artwork and point out how lines can look dashed or continuous.
- Explain that students will create a portrait by gluing yarn onto a burlap napkin to mimic stitching.
- Demonstrate how to lightly draw facial features, hair, and clothing using simple shapes.
- Model applying glue in short, thin lines.
- Show how to press yarn into glue to create dashed or continuous stitched lines.
- Demonstrate overlapping yarn to create thicker lines or texture.
- Guide students to work from large shapes to smaller details.
- Encourage intentional color choices that represent personal identity.
- Remind students to work slowly so the yarn stays in place.
- Support students in adjusting the yarn if it shifts or the glue spreads.
- Allow time for the glue to dry fully before moving the artwork.
Guided Practice
Modify if Gluing Instead of Stitching
- Distribute burlap napkins, yarn, needles, large zip-lock bags to hold all supplies, and heat-erase pens.
- Guide students to lightly outline their face and hair on the burlap.
- Pause to check drawings for size and placement before stitching begins.
- Walk students through threading their needles step by step, offering individual support.
- Guide students in tying a starting knot and positioning the needle at the edge of their design.
- Lead students in stitching the first line together using a running stitch.
- Circulate to support stitch spacing, needle direction, and yarn tension.
- Prompt students to slow down and check their work after every few stitches.
- Encourage students to ask for help if the yarn tangles or stitches skip spaces.
- Remind students to keep needles on the fabric when not stitching.
- Support students in deciding when to move from large shapes to smaller details.
- Reinforce safe tool use and respectful sharing of materials.
- Provide verbal encouragement and specific feedback as students work.
- Pause the class briefly to highlight effective stitching strategies observed.
- Demonstrate adding fabric and beads if desired.
- Continue circulating until students are independently stitching.
Independent Practice
Modify if Gluing Instead of Stitching
- Students independently stitch their self-portrait designs onto burlap napkins.
- Students follow their heat-erase guidelines using a running stitch.
- Students make choices about yarn color, stitch length, and added details.
- Students work from large shapes to smaller features at their own pace.
- Students problem-solve tangles, uneven stitches, or missed spaces using taught strategies.
- Students pause to check progress and adjust stitching as needed.
- Students safely manage needles and materials while working independently.
- Students ask for assistance when needed and continue working while waiting.
- Students complete stitching and tie off yarn independently.
- Students select and use beads or fabric if desired.
- Students trim excess yarn and prepare work for line erasing.
- Students remain focused and engaged until work time ends.
Summary
- Students reflect on how stitching slowly and carefully helped their work improve.
- Students name one challenge they solved during the stitching process.
- Students describe how yarn, fabric, and stitches were used to create lines and shapes.
- Students recognize stitched portraits as a way artists tell stories about identity and belonging.
- Teacher reinforces respect for materials, tools, and cultural art practices.
Assessment
Accuracy of Stitching
Do the lines follow the drawn design; consistent stitch spacing?
Representation of Identity
Do the choices in color, shapes, or symbols reflect personal meaning?
Creativity and Effort
Is there evidence of thoughtful design, problem-solving, and persistence?
Care and Craftsmanship
Was there safe use of needles, neat finishing (knots tied, yarn trimmed), and respectful handling of materials?
Optional
Include a reflection prompt for students to write or share verbally.
Homework
-
Practice drawing a small self-portrait or a favorite symbol on paper, thinking about how lines and shapes can show who you are.
-
Write 2–3 sentences describing one choice you would make in color, stitch, or design if you continued your stitched portrait at home.
Modifications & Accommodations for Stitched Portraits
Needle Alternatives
Use large, blunt plastic needles or yarn threaded through a yarn needle for easier handling.
Yarn Guidance
Offer thicker yarn to make stitching easier to see and manipulate.
Simplified Design
Reduce the number of facial details or clothing elements for students who need a smaller focus.
Partner Support
Pair students with a peer or adult for threading, knot-tying, and stitching practice.
Extended Time
Allow additional class periods for students who work more slowly or carefully.
Modifications & Accommodations for Glued Portraits
Fine-Motor Support
Pre-cut yarn pieces or strips for students who struggle with cutting or handling long strands.
Simplified Patterns
Reduce the number of lines to be glued, focusing on the most essential facial or clothing shapes.
Glue Alternatives
Use glue sticks or low-mess adhesive dots for students with difficulty controlling liquid glue.
Partner Support
Allow peer assistance in placing yarn or holding paper steady.
Extended Time
Provide additional class time for careful placement of yarn or for drying.
Adaptive Materials
Consider using wider yarn or pipe cleaners for students needing more tactile feedback.
Extension & Enrichment Activities
Add Background Designs
Encourage students to create a stitched or yarn-glued background around their portrait using patterns, symbols, or elements from nature.
Experiment with Textures
Introduce different yarn types (thin, thick, fuzzy) or stitch styles to add texture and depth to portraits.
Incorporate Symbols or Stories
Have students add symbolic elements that tell a story about the person they are stitching.
Collaborative Portrait Wall
Students create small self-portraits to display together, forming a mural that represents the class community.
Cross-Curricular Connections
Integrate literacy or history by having students write a short narrative about their stitched portrait or research traditional textile art from other cultures.
Advanced Stitching Techniques (Sewing Method)
Introduce backstitch, satin stitch, or other basic embroidery stitches for students ready to challenge their skills.
Creative Layouts (Gluing Method)
Have students create abstract stitched patterns, self-portrait fragments, or geometric designs using yarn to explore visual composition.
Themes Addressed
Create
- Students design and execute a portrait using yarn and stitching techniques.
- Students apply basic stitches to create lines, shapes, and texture on burlap.
Connect
- Students identify how stitched portraits convey personal identity and belonging.
- Students discuss how art traditions, like stitching, connect to culture and lived experience.
Care
- Students follow safe needle-handling practices and maintain a respectful workspace.
- Students demonstrate patience and persistence while completing their stitched self-portrait.
