Ojibwe (Anishinaabe) Beaded Design
Grade Level
4th • 5th
Subject Area
Elementary History & Social Studies
Related Documents
Download Full Lesson Plan +
Students will observe traditional Ojibwe beadwork designs, select a design to use, and then recreate it by either sewing beads or using construction paper to represent beadwork patterns.
Big Ideas
- Introduction to the Ojibwe (Anishinaabe) people of the Great Lakes.
- Beadwork as functional, decorative, and cultural storytelling.
- Appreciating the authentic work created by women.
2–3 Class Periods for Construction Paper
4–5 Class Periods for Beads
- Learn about Ojibwe culture and beadwork traditions.
- Understand how patterns, color, and symbols communicate meaning.
- Develop patience, fine-motor skills, and craftsmanship.
- Create a beaded design inspired by Ojibwe motifs.
Essential Vocabulary
Ojibwe (Pronounced ow-jeeb-way)
Anishinaabe (Pronounced Ah-nish-in-ah-bay)
Beadwork
Pattern
Symmetry
Motif
Inspired by
Primary Sources
- Spotlight Features (video): Traditional Indigenous Beadwork: An Indigenous Woman’s Journey from Student to Teacher
- University of Victoria Legacy Art Galleries (video): Anishinaabe Beading with Nicole • Lesson 1: Prep and Centre
- Authentic templates (PDF): Métis and Anishinaabe Beading Templates Vol. 1
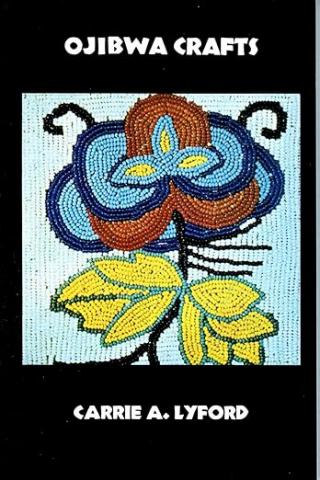
- Ojibwe Crafts by Carrie A. Lyford, R. Schneider Publishers
Materials & Resources
-
Paper and Pencil for Planning
-
Template Printed for Student Use
-
Beads (Pony or Seed)
-
Beading Needles
-
Felt to Sew the Design Onto
-
Thread, Floss, or Yarn
-
Scissors
-
Heat-Erase Pens
OR
- Construction Paper
- Paper Punches to Make Circles to Replicate the Beads
- Glue
- Scissors
- Pencils or Pens
- Observe and discuss traditional Ojibwe beadwork designs.
- Notice patterns, colors, and symbols, and consider their meanings.
- Select or sketch a beadwork design you would like to create.
- Trace your selected design onto the felt using a heat-erase pen, or onto construction paper using a pencil. Tracing is used to honor and respect authentic Ojibwe designs as a way to study and learn from them. If you prefer, you may also create an original design inspired by what you observed.
- Decide how you will represent your beads.
- Sew with beads and a needle.
OR - Use a paper punch to create construction-paper circles to represent beads.
- Sew with beads and a needle.
- Plan your color choices and pattern layout before beginning.
- Carefully create your design, working slowly and thoughtfully.
- Check your work as you go and make adjustments if needed.
- Practice patience and perseverance when challenges arise.
- Share your finished piece and reflect on your process and learning.
Warm-Up
- Research and share examples of Ojibwe beadwork, focusing on color, symbolism, or regional styles:
- Look closely at images of traditional Ojibwe beadwork.
- Show one or both videos along with the templates and book.
- Participate in a brief discussion about patterns, colors, and symbols you notice.
- Consider what stories, ideas, or values the designs might communicate.
- Make a quick personal connection: Which design or pattern draws your eye, and why?
Direct Instruction
Content
-
Learn about the Ojibwe people and the cultural significance of beadwork.
-
Observe and analyze traditional Ojibwe designs, colors, and symbols.
-
Understand how patterns often reflect nature, community, and storytelling.
-
Explore the beading process: Selecting a design, colors, and pattern with sewing beads or representing beads with paper circles.
-
Connect beadwork to math concepts (patterns, repetition, symmetry).
-
Connect beadwork to history, recognizing women’s and community knowledge passed through generations.
Student Instruction
Beading Process
Show how to either sew with beads or use a paper punch to create construction paper circles to represent beads.
- Demonstrate how to plan a beadwork design on felt or paper - do you want the design in the middle or off to a side?
Model How to Sew on Beads Step-by-Step
- Thread the needle and tie a secure knot.
- Bring the needle up through the fabric.
- Slide three beads onto the needle.
- Lay the beads on their side to determine where to go down with your needle.
- Push the needle down through the fabric after the third bead.
- Pull gently to secure the beads.
- Bring the needle back up through the same three beads to secure them so they lie flat. This also doubles to secure the beads.
- Push the needle back down through the thread.
- Pull the needle up, going through the last bead, add three more beads, and repeat the process.
Model how to create paper punches and glue the construction-paper “beads.”
- Use a small dot of glue.
- Place the paper circle carefully on the design.
- Press gently and allow time to dry.
- Review safety expectations for needles, glue, and shared materials.
- Emphasize careful craftsmanship, patience, and respect for the tradition.
Guided Practice
It is very helpful to have other adults to help in the beginning!
- Demonstrate the beading process with the whole group, using oversized materials so all students can clearly see each step.
- Repeat the demonstration in small groups, adjusting pace and support as needed.
- Pause frequently to check for understanding and clarify steps.
- Practice together, completing the first few beads as a guided class activity.
- Circulate to provide hands-on coaching, modeling again as needed.
- Re-demonstrate key steps multiple times throughout the work period.
- Encourage students who understand the process to support peers by modeling and explaining the steps.
- Gradually release responsibility, so students work more independently while helping one another.
Independent Practice
- Students independently create their beadwork design using their chosen method (sewing beads or gluing paper beads).
- Students follow their planned pattern, making intentional choices about color, repetition, and symmetry.
- Students work at their own pace, practicing patience and perseverance.
- Teacher circulates to observe, provide feedback, and offer support as needed.
- Students problem-solve independently before asking for help.
- Peer support is encouraged when appropriate.
- Students reflect quietly on their progress and make adjustments to improve craftsmanship.
Summary
Finish & Reflect
- Student reflection and feedback.
- Include a gallery walk for students to share and observe each other’s work throughout the process.
Assessment
Students demonstrated an understanding that Ojibwe beadwork is a meaningful cultural art form. They used pattern and color intentionally and showed care and focus throughout the process. Students worked through challenges, made thoughtful design choices, and completed artwork that reflected both personal expression and respect for Ojibwe traditions. Reflections showed growing awareness of the cultural and historical significance of beadwork and confidence in learning through making.
Homework
Look for beaded art or patterned designs in your everyday life.
Modification & Accommodations
This lesson is designed to be flexible and accessible to all learners. Modifications and accommodations support fine-motor needs, attention, processing, and varied learning styles.
- Provide alternative materials such as pre-punched circles, larger beads, or pre-threaded needles.
- Offer simplified designs for students who benefit from reduced complexity.
- Allow students to work at different paces, with extended time as needed.
- Use visual examples, step-by-step modeling, and anchor charts to support understanding.
- Pair students strategically for peer support or guided collaboration.
- Break the process into clear, manageable steps with check-ins.
- Offer choice in how learning is demonstrated (finished piece, verbal explanation, drawing, or reflection).
- Provide frequent encouragement and check-ins to support confidence and perseverance.
Extension & Enrichment Activities
- Create a more complex or larger-scale design using increased pattern repetition or symmetry for the whole class to work on.
- Research and share examples of Ojibwe beadwork, focusing on color, symbolism, or regional styles.
- Write or draw a design story, explaining the meaning behind their pattern and color choices.
- Explore math connections by identifying fractions, symmetry, or tessellations within their design.
- Compare Ojibwe beadwork with beaded or patterned art from another culture, noting similarities and differences.
- Translate a beaded design into another medium (drawing, painting, textile, or digital pattern).
Themes Addressed
Character
-
Build respect for Ojibwe culture, traditions, and living artists.
-
Practice care and patience, honoring beading as a slow, intentional process.
-
Develop perseverance when working with small materials and detailed patterns.
-
Foster belonging by recognizing beadwork as a way to share stories, identity, and values.
-
Learn to be responsible cultural learners, understanding the difference between appreciation and appropriation.
Choice
-
Choose a traditional-inspired design to work from (with guidance and context).
-
Decide how to represent beads: sewing beads onto fabric or paper, punching circles to model bead placement.
-
Select color combinations thoughtfully, based on observation and meaning.
-
Choose the scale or complexity of the design to match personal readiness.
-
Share learning through: A finished beaded or paper design. Consider a written or verbal reflection about the process and meaning.
